

When it comes to securing cargo during transportation, E track wheel straps are an extremely useful piece of equipment. This adaptable and dependable system offers a stable anchor point that is both strong and adjustable, thereby ensuring the safe and secure transportation of goods. In this piece, we will demonstrate how to make efficient use of E track wheel straps by providing a step-by-step instruction guide.
First Step: Getting the E-Track System Ready:
Make sure that the E-Track rails are properly installed and mounted in your trailer or vehicle before you attempt to use the ratchet straps that are designed for use with E-Track. It is important that the rails be placed in the correct locations so that they are aligned with the cargo and create a stable anchor point. Conduct a thorough inspection of the E-Track system, looking for any signs of damage or wear that might put its robustness or efficiency at risk.
Step 2: Choosing the Appropriate Straps to Wear:
Pick out some E track wheel straps whose dimensions and capacities are suitable for the load you need to secure. When securing a load, it is important to take into consideration the working load limit (WLL) and breaking strength of the straps to ensure that they are up to the task. Check the straps to see if there are any signs of damage or wear, such as cuts, fraying, or stitching that has become weakened. It is critical to make use of straps that are in good condition in order to preserve their tenacity and dependability.
Attaching the E-Track End Fittings is the third step.
There will be an E-Track fitting attached to one end of the ratchet strap. This fitting is designed to attach firmly to the E-Track rail. When installing the fitting, make sure to align it with the desired location before inserting it into the E-Track anchor point. Put some force into it as you do so, and keep pushing until you hear a click or feel it lock into place. To check that it is securely fastened, just give it a light pull.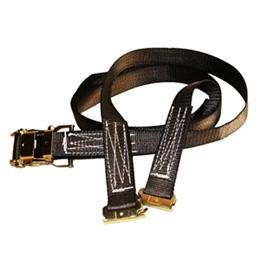
Position and secure the cargo as the fourth step:
Your load should then be positioned in the desired location and aligned with the E-Track rails. In order to keep the load balanced and stable while it is in transit, you need to make sure that it is centered and distributed evenly. In the event that it is required, use dunnage or some other kind of blocking material to fill in any gaps and prevent movement.
Fifth Step: Thread the Ratchet Strap Depending on the make-up of your load, take the loose end of the ratchet strap and either thread it through or around the cargo.
Move the strap around the cargo until you find the appropriate anchor points or attachment points, and then pass it through those. Make sure the strap is positioned so that it has an even tension throughout its length and reduces the likelihood of any rubbing or friction occurring.
Once the strap has been threaded through the cargo, proceed to Step 6 to engage the ratchet mechanism by securing the loose end of the strap to the ratchet mechanism.
Place the strap inside the ratchet spool, making sure that E track wheel straps is aligned correctly before doing so. To pull the strap in closer together, start turning the ratchet handle in both directions. A safe and secure grip on the cargo is ensured by the ratchet mechanism's capacity for incrementally increasing the amount of tension applied to it.
The seventh step is to reach the desired level of tension:
Carry on operating the ratchet handle until the strap reaches the desired level of tension. Be careful not to overtighten the strap, as this could result in the cargo being damaged or the integrity of the strap being compromised. It is important that the strap is tight and secure so that there is no significant movement or shifting of the cargo while it is being transported.
Step 8: Lock the Ratchet Mechanism To prevent the tension from being accidentally released, you will need to engage the locking mechanism that is located on the ratchet handle.
The lock will keep the strap in place, allowing for the appropriate amount of tension to be maintained while also ensuring that the cargo is kept safe throughout the journey.
After securing the cargo using the E-Track ratchet straps, perform a thorough inspection of the entire setup to ensure that everything is in working order.
Verify that each strap is attached correctly, that the ratchet mechanisms are locked, and that the E-Track system is firmly attached. Check each component to ensure that there are no obvious signs of wear or damage on any of them. Applying a light amount of pressure to the cargo and giving it a slight shake are both great ways to double check both its tension and its overall stability. Check to see that the cargo does not move around too much and that it does not become dislodged from its current position.
Release the Straps Once you have arrived at your destination and are prepared to unload the cargo, it is time to release the tension on the straps.
To accomplish this, pull up on the release lever or button to disengage the ratchet mechanism. This can be found on the side of the mechanism. While maintaining control, unwind the strap from the ratchet spool. This will help prevent any jerky movements or snapping that might occur.
When the tension has been released, proceed to Step 11 and remove the E track wheel straps from both the cargo and the E-Track system.
Press the release lever or button and then pull the E-Track end fittings out of the E-Track rails to detach them from the anchor points where they were attached to the E-Track.
Step 12: Properly Store the Straps After each use, it is important to make sure that the E track wheel straps are properly stored in an environment that is both clean and dry.
Roll the straps up in a neat coil to prevent them from becoming tangled or damaged. Keep them in a place that is shielded from direct sunlight, temperatures that are too high or too low, substances that contain chemicals, and anything else that might cause the material of the straps to deteriorate.